No Bake Peanut Butter Bars: An Incredible Ultimate Recipe
No Bake Peanut Butter Bars are an amazing treat that combines creamy peanut butter with a sweet, cookie-like base. These bars are not just quick to make; they’re also incredibly satisfying and perfect for those moments when you’re craving something sweet without the fuss of baking. The combination of ingredients creates a rich flavor profile that will leave you reaching for another piece every time. Perfect for parties, movie nights, or simply as an afternoon pick-me-up, this recipe promises to be a crowd-pleaser!
What makes No Bake Peanut Butter Bars even more enticing is their simplicity. You don’t need to preheat the oven or worry about complicated baking techniques. Instead, you can whip up this delightful dessert in no time. If you’re someone who enjoys culinary creativity without the heat of the oven, then this recipe is just for you!
In this guide, we will explore why you’ll love these incredible Peanut Butter Bars, how to prepare them, what ingredients you’ll need, and provide you clear, step-by-step instructions to ensure your success. Get ready to enjoy a sweet treat that requires minimal effort but delivers maximum flavor!
Why You’ll Love This Recipe
No Bake Peanut Butter Bars are not just delicious; they offer a unique combination of factors that make them a must-try for dessert lovers. Here are a few reasons why you’ll adore this recipe:
1. Quick and Easy: With no baking required, these bars can be prepared in under 30 minutes.
2. Simple Ingredients: Most ingredients are pantry staples that you likely already have on hand.
3. Versatile Recipe: Feel free to customize the toppings or mix-ins to suit your taste preferences.
4. Ideal for Any Occasion: They’re great for potlucks, parties, or just a cozy night in.
5. No Special Equipment Needed: All you need is a mixing bowl and a baking dish.
6. Balanced Flavors: The combination of peanut butter, chocolate, and a hint of sweetness is truly satisfying.
7. No Fuss Cleanup: Since there’s no baking, cleanup is a breeze!
Given these fantastic qualities, it’s easy to see why No Bake Peanut Butter Bars are loved by many and perfect to whip up any day of the week!
Preparation and Cooking Time
Preparing No Bake Peanut Butter Bars is quick and straightforward. Here’s a breakdown of the time involved:
– Preparation Time: 15 minutes
– Chilling Time: 30-60 minutes (or until set)
– Total Time: Approximately 1 hour or less
As you can see, this recipe does not require lengthy cooking times, making it convenient for those spontaneous cravings.
Ingredients
– 1 cup creamy peanut butter
– 1 cup graham cracker crumbs
– 1 cup powdered sugar
– ½ cup unsalted butter, melted
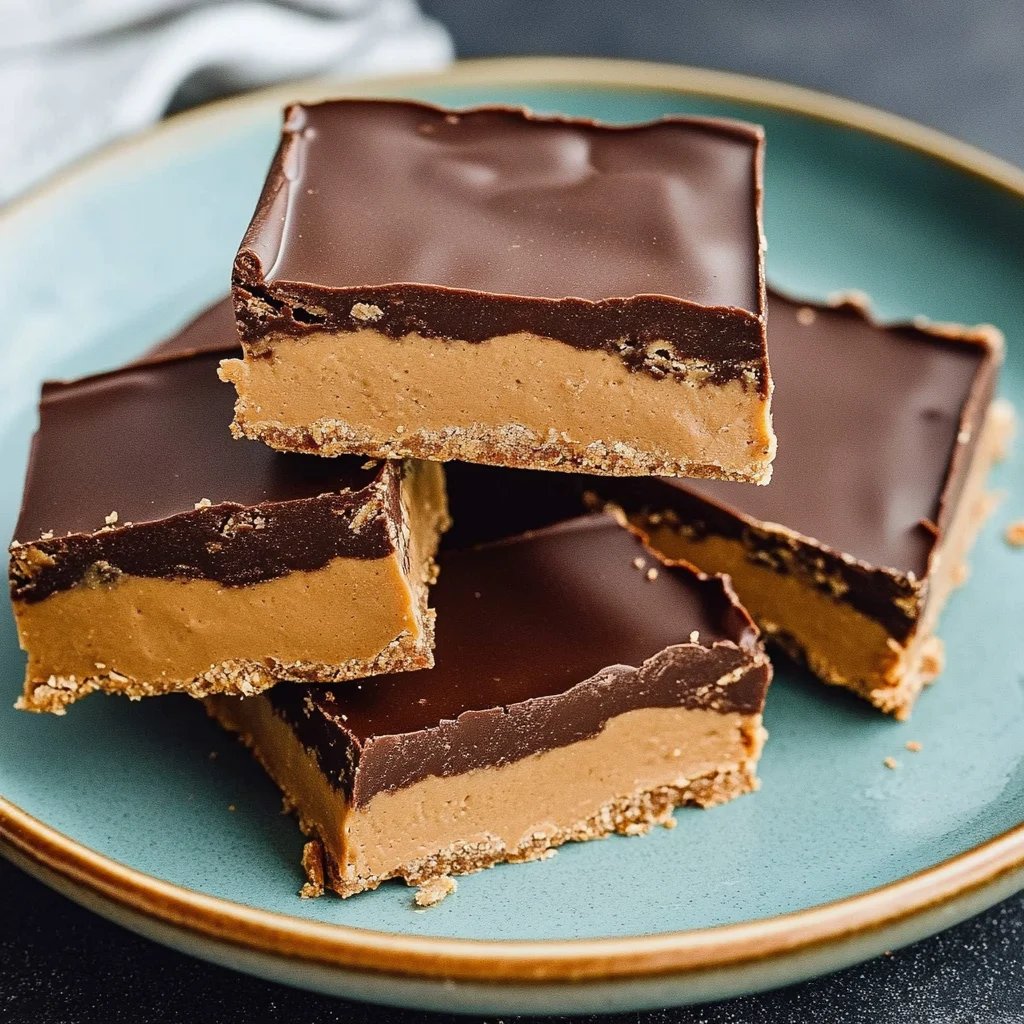
– 1 cup semi-sweet chocolate chips
– 2 tablespoons coconut oil (optional, for a smoother chocolate layer)
The simplicity of these ingredients allows for a straightforward process while yielding wonderfully tasty results!
Step-by-Step Instructions
Creating No Bake Peanut Butter Bars is a simple process. Just follow these steps for success:
1. Prepare the Pan: Line an 8×8-inch baking dish with parchment paper for easy removal of the bars.
2. Mix Base Ingredients: In a large bowl, combine the peanut butter, graham cracker crumbs, powdered sugar, and melted butter. Stir until well mixed and smooth.
3. Press Mixture into Pan: Transfer the peanut butter mixture into the prepared baking dish. Use a spatula to press it down evenly and firmly.
4. Create Chocolate Topping: In a microwave-safe bowl, combine the chocolate chips and coconut oil (if using). Heat in 30-second intervals, stirring between each interval until completely melted and smooth.
5. Spread Chocolate: Pour the melted chocolate over the peanut butter base, using a spatula to spread it evenly across the surface.
6. Chill: Place the baking dish in the refrigerator and chill for at least 30-60 minutes, or until the bars are firm.
7. Slice: Once set, take the dish out of the refrigerator, lift the bars out using the parchment paper, and cut into squares or rectangles.
8. Serve: Your No Bake Peanut Butter Bars are now ready to be served and enjoyed!
These clear step-by-step instructions ensure that every kitchen novice or expert can succeed in creating these delicious peanut butter bars effortlessly.
How to Serve
To elevate your serving experience with No Bake Peanut Butter Bars, consider the following tips:
1. Presentation: Arrange the bars on a decorative platter or cake stand for an appealing display.
2. Pairings: Complement the bars with a scoop of vanilla ice cream or whipped cream to enhance the flavor even more.
3. Garnish: Drizzle additional melted chocolate or sprinkle crushed peanuts on top for a visually appealing finish.
4. Storage Advice: Store any leftovers in an airtight container in the refrigerator for up to a week, ensuring they maintain their freshness.
5. Occasion-Specific Serving: For gatherings, serve them alongside other desserts for a sweet spread.
By following these serving suggestions, you can create a delightful experience for yourself and your guests! Enjoy these incredible No Bake Peanut Butter Bars and relish every mouthful!
Additional Tips
– Use Natural Peanut Butter: Opt for natural peanut butter without added sugars or oils to create a healthier version.
– Add a Pinch of Salt: A small pinch of salt can enhance the flavor of the peanut butter, giving a more balanced taste.
– Experiment with Sweeteners: You can try using honey, agave nectar, or maple syrup instead of powdered sugar for a different sweetness profile.
– Personalize with Spices: Consider adding cinnamon or vanilla extract for an additional layer of flavor.
Recipe Variation
Feel free to switch things up! Here are a few variations to try:
1. Chocolate Peanut Butter Swirl: Swirl melted chocolate into the peanut butter mixture before pressing it into the pan for a marbled effect.
2. Nutty Addition: Mix in chopped nuts such as almonds, walnuts, or pecans for added crunch and nutrition.
3. Healthier Version: Substitute graham cracker crumbs for crushed oats or almond flour to create a gluten-free alternative.
4. Different Chocolate: Use white chocolate or dark chocolate instead of semi-sweet chocolate chips for a unique twist.
5. Add Protein: Incorporate protein powder into the base for an extra protein boost, ideal for a healthy snack.
Freezing and Storage
– Storage: Keep your No Bake Peanut Butter Bars in an airtight container in the refrigerator. They will last up to a week.
– Freezing: You can freeze the bars for up to three months. Wrap them individually or layer with parchment paper in an airtight container to prevent sticking.
Special Equipment
You will need a few essential tools to prepare this treat successfully:
– Mixing bowl
– Baking dish (8×8-inch)
– Parchment paper
– Microwave-safe bowl for melting chocolate
– Spatula for spreading the mixture
Frequently Asked Questions
Can I use crunchy peanut butter instead of creamy?
Yes, crunchy peanut butter will give your bars a delightful texture.
How do I cut the bars evenly?
Use a sharp knife and wipe it clean after each cut to ensure neat edges.
Can I make these bars vegan?
Absolutely! Substitute the butter with vegan margarine and ensure the chocolate chips are dairy-free.
What can I add to boost the flavor?
Consider adding sea salt flakes on top or sprinkle with toasted coconut for added taste and texture.
How should the peanut butter bars be served?
Serve chilled as-is, or warm slightly in the microwave for a gooey treat.
Conclusion
No Bake Peanut Butter Bars are simply irresistible, offering a perfect blend of sweetness and creaminess. The ease of preparation and the flexibility of ingredients make them an ideal dessert for any occasion—be it a party, gathering, or simply a sweet craving at home. Once you try this recipe, it is likely that it will become a staple in your dessert repertoire. The delightful combination of flavors and textures promises to transport you into a world of indulgence with every bite!