Homemade Cinnamon Rolls: An Incredible Recipe for Breakfast Bliss
Homemade Cinnamon Rolls are a delightful treat that can brighten up any morning. The combination of soft, fluffy dough and warm, gooey cinnamon filling creates an irresistible aroma that fills your kitchen with warmth and comfort. There’s just something special about the first bite of a freshly baked cinnamon roll, making it a beloved breakfast staple in many households. If you’ve ever enjoyed these sweet rolls from a bakery, you might wonder how to replicate that incredible taste at home.
In this comprehensive guide, we’re diving deep into the world of cinnamon rolls. You’ll learn not only why this recipe is remarkably simple and satisfying but also appreciate the joy of baking from scratch. I’ll walk you through each step, ensuring that even novice bakers feel confident tackling this delicious project. Plus, the end result will have your family and friends raving about your baking skills!
Explore the unique combination of flavors and textures in these rolls that will make every bite feel like a warm hug. You’ll soon understand why Homemade Cinnamon Rolls are so loved and how they can easily become your next go-to recipe for a cozy morning. Whether you’re celebrating a special occasion or simply want to indulge yourself, these rolls are the perfect accompaniment to your coffee or tea. Get ready to sprinkle some flour, roll out some dough, and create a batch of heavenly cinnamon rolls that will surely impress everyone!
Why You’ll Love This Recipe
There are countless reasons why this Homemade Cinnamon Rolls recipe will steal your heart. Here are just a handful that highlight its brilliance:
1. Easy to Make: With straightforward ingredients and easy-to-follow steps, you’ll find that baking cinnamon rolls at home is not as daunting as it seems.
2. No Special Equipment Needed: All you need is a mixing bowl, rolling pin, and a baking dish. You can create these treats with equipment you probably already have on hand.
3. Customizable: Feel free to personalize your rolls with different fillings, such as nuts, dried fruits, or even cream cheese frosting. The possibilities are endless!
4. Perfect for Any Occasion: Whether it’s a lazy Sunday brunch, a holiday breakfast, or a potluck dessert, these rolls are sure to impress.
5. Make Ahead and Freeze: You can prepare the dough and filling ahead of time, allowing you to bake them whenever the craving strikes.
6. Heavenly Aroma: The scent of cinnamon and sugar wafting through your home will make everyone feel warm and welcomed, heightening the experience of enjoying these delectable rolls.
With these delightful aspects in mind, it’s easy to see why Homemade Cinnamon Rolls have become a favorite in many households. The joy of pulling a warm tray of rolls from the oven, the sight of melted frosting drizzling down each one—these are truly special moments.
Preparation and Cooking Time
Making Homemade Cinnamon Rolls is a labor of love, but the process is worth every minute. Here’s a quick breakdown of the total time you’ll need for preparation and cooking:
– Preparation Time: 20 minutes
– Resting Time: 1 hour (for the dough to rise)
– Baking Time: 25-30 minutes
– Cooling Time: 10-15 minutes
This means that in about 2 hours, you’ll be rewarded with fresh cinnamon rolls ready to enjoy! The resting time is crucial as it allows the dough to rise, creating that perfect fluffy texture.
Ingredients
– 4 cups all-purpose flour
– ½ cup granulated sugar
– 1 packet (2 ¼ teaspoons) active dry yeast
– 1 teaspoon salt
– 1 cup whole milk
– ½ cup unsalted butter, melted
– 2 large eggs
– 1 tablespoon ground cinnamon
– ½ cup packed brown sugar
– ¼ cup softened butter (for filling)
– 1 cup powdered sugar (for icing)
– 1-2 tablespoons milk (for icing)
– Optional: chopped nuts or raisins
Step-by-Step Instructions
Creating these Homemade Cinnamon Rolls is simple if you follow these clear steps:
1. Combine Ingredients: In a large mixing bowl, whisk together 2 cups of flour, sugar, yeast, and salt.
2. Heat Milk: In a small saucepan, heat milk and melted butter until warm (not boiling). Remove from heat.
3. Mix Wet and Dry: Add the warm milk mixture to the dry ingredients. Mix well.
4. Add Eggs: Beat in the eggs until fully incorporated.
5. Incorporate Flour: Gradually add remaining flour, one cup at a time, mixing until a smooth dough forms.
6. Knead Dough: Turn the dough onto a floured surface and knead for about 5-7 minutes until it becomes smooth and elastic.
7. First Rise: Place the dough in a greased bowl, cover with a damp cloth or plastic wrap, and let it rise in a warm area for about 1 hour until doubled in size.
8. Prepare Filling: While the dough rises, mix cinnamon, brown sugar, and softened butter in a bowl to create the filling.
9. Roll Out Dough: Once risen, punch down the dough and roll it out on a floured surface into a rectangle (about 15×10 inches).
10. Add Filling: Spread the filling mixture evenly over the dough.
11. Roll Up: Starting from one long side, tightly roll the dough into a log shape.
12. Cut Rolls: Slice the roll into 12 equal pieces and place them in a greased baking dish.
13. Second Rise: Cover the rolls again and let them rise for about 30 minutes until they double in size.
14. Preheat Oven: While the rolls are rising, preheat your oven to 375°F (190°C).
15. Bake: Bake in the preheated oven for 25-30 minutes or until golden brown.
16. Cool: Once baked, allow the rolls to cool in the pan for 10-15 minutes.
17. Make Icing: In a small bowl, mix powdered sugar with enough milk to reach your desired icing consistency.
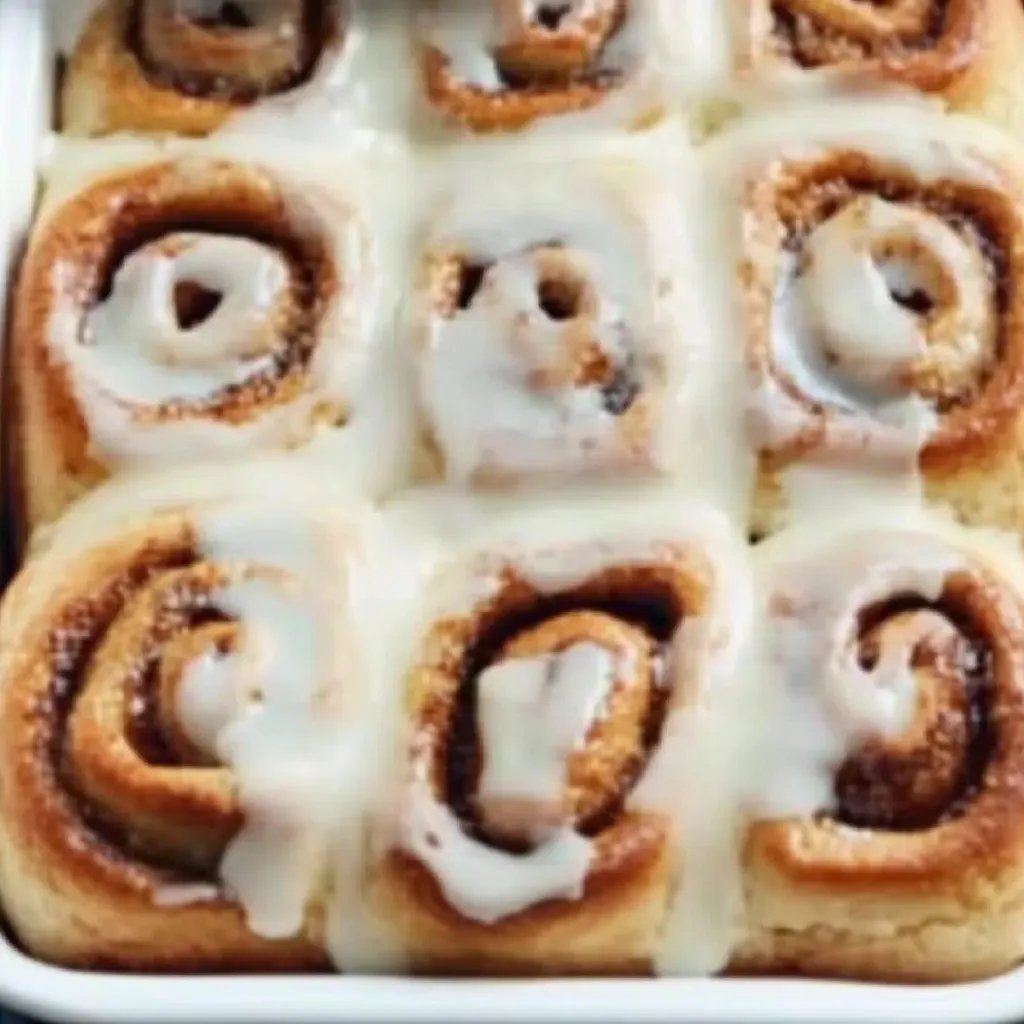
18. Drizzle Icing: Drizzle the icing over the warm cinnamon rolls before serving.
By following these steps, you’ll end up with a gorgeous batch of Homemade Cinnamon Rolls that are as stunning as they are delicious.
How to Serve
To elevate the experience of enjoying your Homemade Cinnamon Rolls, consider the following suggestions for serving:
1. Presentation: Place rolls in a beautiful serving dish. Consider using decorative plates or a cake stand to add a touch of elegance.
2. Accompaniments: Serve with a side of fresh fruit, coffee, or hot cocoa for a complete breakfast experience.
3. Warmth Is Key: Cinnamon rolls are best enjoyed warm. If they cool, try reheating them briefly in the microwave.
4. Extra Toppings: Enhance your rolls by adding chopped nuts, a dollop of whipped cream, or even a scoop of vanilla ice cream for a dessert-like twist.
5. Share and Enjoy: Encourage family and friends to dig in together. Baking brings people together, and these rolls are meant to be savored and shared!
These tips for serving will make your Homemade Cinnamon Rolls even more enjoyable for everyone at the table. With their delicious flavors and warm, inviting aroma, you can be sure these rolls will be a hit!
Additional Tips
– Use Fresh Yeast: Using fresh active dry yeast ensures a good rise and fluffy texture. Always check the expiration date.
– Temperature Matters: Make sure the milk is warm, not hot. If it’s too hot, it can kill the yeast.
– Patience is Key: Allow the dough to rise fully. Rushing this step can lead to denser rolls.
– Experiment with Fillings: Try different spices like nutmeg or cardamom in addition to cinnamon for a unique flavor twist.
– Keep Rolls Moist: To prevent your cinnamon rolls from drying out, cover them with a clean kitchen towel while they cool.
Recipe Variation
Feel free to switch things up! Here are a few variations to try:
1. Maple Pecan Cinnamon Rolls: Add chopped pecans to the filling and use maple syrup in the icing for a distinct flavor.
2. Pumpkin Spice Cinnamon Rolls: Incorporate pumpkin puree into the dough and add pumpkin spice to the filling for a fall-inspired twist.
3. Chocolate Chip Cinnamon Rolls: Mix in chocolate chips with the brown sugar and cinnamon for a sweeter treat.
4. Cream Cheese Filling: Replace the butter filling with a layer of cream cheese combined with sugar for a rich cream cheese swirl.
Freezing and Storage
– Storage: Keep the rolls in an airtight container at room temperature. They are best enjoyed fresh but will stay good for 3-4 days.
– Freezing: You can freeze unbaked rolls after slicing them. Place them on a baking sheet until frozen solid, then transfer to a freezer bag. They can be stored for up to 2 months. Bake from frozen; just add 5–10 minutes to the cooking time.
Special Equipment
You will need a few essential tools to prepare these rolls successfully:
– Mixing bowls
– Measuring cups and spoons
– Rolling pin
– Baking dish (9×13 inches is ideal)
– Kitchen towel to cover the dough while rising
– Electric mixer (optional for dough mixing but recommended for ease)
Frequently Asked Questions
How do I know if my cinnamon rolls are baked properly?
Check if they are golden brown on top. You can also insert a toothpick in the center; it should come out clean.
Can I use whole wheat flour instead of all-purpose flour?
Yes, you can use whole wheat flour, but the texture will be denser. You may need to adjust the liquid slightly.
What can I do if my dough isn’t rising?
Ensure your yeast is fresh and that the milk was warmed to the right temperature. If your kitchen is chilly, try placing the dough in a warmer spot.
How do I store leftover cinnamon rolls?
Place the rolls in an airtight container at room temperature. They taste best when reheated.
Can I make these cinnamon rolls dairy-free?
Absolutely! Substitute the whole milk with a non-dairy milk like almond or coconut milk and use dairy-free butter for the filling and icing.
Conclusion
Homemade Cinnamon Rolls are a delightful way to start your day or to treat your loved ones. With their soft, fluffy texture and sweet cinnamon filling, these rolls are sure to become a cherished part of your breakfast repertoire. The joy of creating them in your own kitchen—filling your home with that irresistible aroma—is unparalleled. Plus, the ability to customize them makes each batch a unique creation. Embrace the process, share them with friends, and enjoy the compliments that are sure to follow!