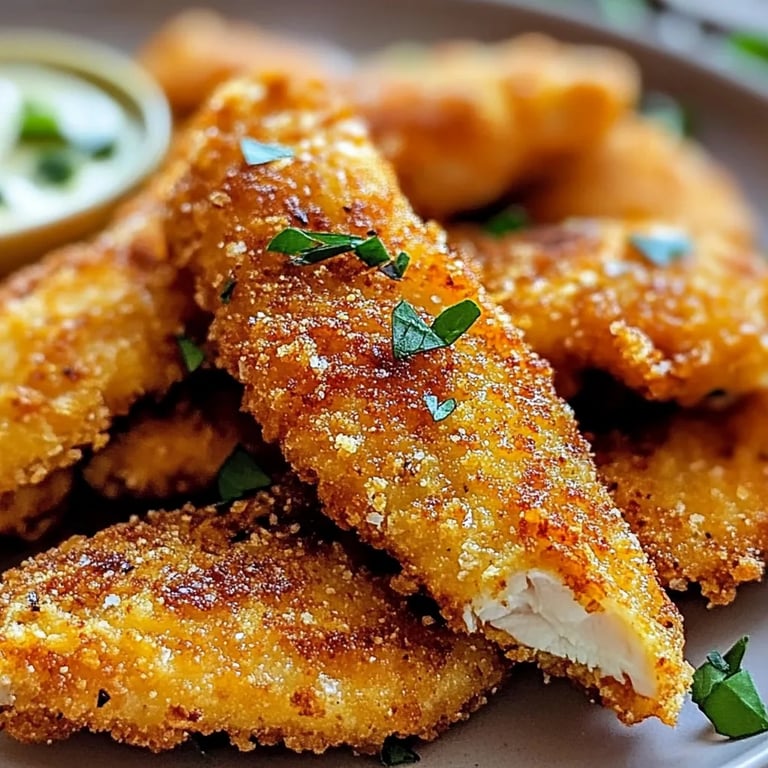
Crispy Homemade Baked Chicken Tenders: An Incredible Ultimate Recipe
Crispy Homemade Baked Chicken Tenders are a culinary delight that brings joy to any dining table. This amazing recipe transforms simple chicken into golden, crunchy pieces that are loaded with flavor. Whether you’re serving them for a family dinner or as a game-day snack, these tenders will become an instant hit. Imagine biting into a piece of tender chicken coated in a perfectly crispy layer that crunches as you bite in. It’s pure happiness on a plate.
These tenders are not only delicious; they are also an excellent alternative to fried chicken. By baking instead of frying, you can enjoy a healthier version without sacrificing taste. If you’ve been searching for a go-to recipe that marries health and flavor, look no further. In this article, we’ll explore everything you need to know about making these crispy sensations, including why this recipe is irresistible, the preparation time, and step-by-step instructions for an unforgettable experience.
Creating crispy baked chicken tenders at home may seem daunting, but it’s quite simple. Simple, fresh, and accessible ingredients come together in a way that enhances the flavor of each bite. Let’s dive into what makes these tenders a must-try dish for anyone looking to satisfy their cravings!
Why You’ll Love This Recipe
Crispy Homemade Baked Chicken Tenders are loved for several compelling reasons. Here are some key points that highlight why this recipe deserves a spot in your culinary repertoire:
- Healthier Option: Baking instead of frying significantly reduces calories and unhealthy fats.
- Customization: You can easily modify the seasonings to suit your taste preferences.
- Kid-Friendly: These tenders are perfect for kids and are often a favorite among children for their crunchy exterior and juicy insides.
- Easy Meal Prep: They can be made in bulk and stored for quick meals later in the week.
- Versatile Serving Options: Serve them with dipping sauces, salads, or wraps, making them perfect for any occasion.
- Simple Ingredients: The ingredients are commonly available and don’t require any specialty items.
Understanding these aspects makes it clear why many rave about crispy baked chicken tenders. This dish not only tantalizes your taste buds but also brings comfort and satisfaction to every meal.
Preparation and Cooking Time
Creating Crispy Homemade Baked Chicken Tenders takes a total of about 40 minutes. Here’s how the time breaks down for prepping and cooking:
- Preparation Time: 15 minutes
- Cooking Time: 25 minutes
These time estimates can vary depending on your kitchen experience and oven, but following this framework will ensure you have a delicious batch of chicken tenders ready in no time.
Ingredients
- 1 pound chicken tenderloins
- 1 cup all-purpose flour
- 2 large eggs
- 2 cups breadcrumbs (panko preferred for extra crunch)
- 1 teaspoon garlic powder
- 1 teaspoon paprika
- 1 teaspoon salt
- 1/2 teaspoon black pepper
- 1/2 teaspoon onion powder
- 1/2 teaspoon dried Italian herbs
- 1 tablespoon olive oil (optional)
- Cooking spray (for baking)
Step-by-Step Instructions
Creating Crispy Homemade Baked Chicken Tenders is straightforward if you adhere carefully to these steps:
- Preheat Oven: Preheat your oven to 400°F (200°C). This ensures the tenders become crispy once baked.
- Prepare Baking Sheet: Line a baking sheet with parchment paper or lightly grease it with cooking spray.
- Setup Dredging Station: Set up three bowls for the breading process.
- In the first bowl, add flour mixed with salt, pepper, garlic powder, paprika, onion powder, and dried Italian herbs.
- In the second bowl, whisk the eggs until well-blended.
- In the third bowl, pour the breadcrumbs.
- Coat Chicken:
- First, dredge each chicken tenderloin in the flour mixture, shaking off excess.
- Next, dip it in the beaten eggs, allowing any excess to drip off.
- Finally, roll it in the breadcrumbs to ensure even coating.
- Arrange on Baking Sheet: Place the coated chicken tenders on the prepared baking sheet. Ensure they are spaced apart for even cooking.
- Optional Olive Oil Spray: Lightly spray the chicken tenders with olive oil on top to promote browning.
- Bake: Place the baking sheet in the preheated oven and bake for 20-25 minutes. Flip the tenders halfway through cooking for even crispiness.
- Check for Doneness: The tenders should be golden brown, and an internal thermometer should read 165°F (75°C) for safe consumption.
- Cool Slightly: Allow them to cool for a few minutes before serving, letting the crispy coating set.
- Serve Warm: Pair the tenders with favorite dipping sauces, such as honey mustard, ranch, or barbecue sauce.
By following these clear steps, you can create an amazing batch of crispy chicken tenders effortlessly.
How to Serve
Presenting your Crispy Homemade Baked Chicken Tenders can elevate the meal experience. Here are some tips for serving them:
- Dipping Sauce Variety: Lay out a selection of dipping sauces for guests to choose from, such as honey mustard, barbecue, ranch, or spicy ketchup.
- Serve with Sides: Pair your chicken tenders with classic sides like coleslaw, French fries, or a fresh garden salad for a hearty meal.
- Creative Wrapping: Consider wrapping tenders in lettuce leaves with a drizzle of sauce for a fun, low-carb option.
- Presentation: Use a stylish serving platter or basket lined with parchment paper for an inviting look.
- Garnish: Add a sprinkle of fresh herbs like parsley or cilantro to enhance visual appeal.
- Accompanying Beverages: Serve with refreshing drinks like lemonade, iced tea, or your favorite soda to complement the meal.
With these serving suggestions, your crispy chicken tenders will be the star of the show, pleasing everyone at your table. Enjoy the delightful crunch and flavor of these amazing home-cooked delights!
Additional Tips
- Use Fresh Chicken: For the best flavor and texture, choose fresh chicken tenderloins over frozen. Fresh chicken helps achieve that tender and juicy outcome.
- Breading Consistency: Make sure the breading adheres well. Thin layers of flour and egg help breadcrumbs stick better, ensuring a perfect layer of crunch.
- Spice Variations: Don’t be afraid to experiment with spices! Adding cayenne for heat, or replacing the paprika with smoked paprika can elevate the flavor.
- Keep the Oven Door Closed: Avoid checking on the tenders too often; consistent temperature is key to achieving the perfect crisp.
- Let them Rest: Allow the tenders to rest shortly after baking. This helps the coating set and keeps them crunchy when served.
Recipe Variation
Try these fun variations for a different spin on your crispy chicken tenders:
- Almond-Crusted Tenders: Substitute part of the breadcrumbs with finely crushed almonds for a nutty flavor and extra texture.
- Buffalo Boneless Wings: After baking, toss the tenders in your favorite buffalo sauce for a spicy kick.
- Parmesan Herb Coat: Add grated Parmesan cheese to the breadcrumb mix for a cheesy crust and added flavor.
- Coconut-Crusted Tenders: Use shredded coconut mixed with breadcrumbs for a sweet twist that pairs well with a mango dipping sauce.
Freezing and Storage
- Storage: Leftover chicken tenders can be stored in an airtight container in the refrigerator for up to 3 days.
- Freezing: For longer storage, freeze the cooked tenders in a single layer on a baking sheet until solid, then transfer to a resealable bag. They can be stored for up to 3 months. Reheat in the oven for best results, aiming for a crisp texture.
Special Equipment
While this recipe doesn’t require specialized equipment, having the following can make preparation easier:
- Baking Sheet: A good quality baking sheet helps evenly distribute heat while cooking.
- Parchment Paper: This helps prevent sticking and simplifies cleanup.
- Three Mixing Bowls: Essential for setting up the dredging station for the breading process.
- Wire Rack: If you have one, placing the tenders on a wire rack in the oven can enhance airflow and crispiness during baking.
Frequently Asked Questions
Let them cool slightly before serving, and avoid covering them, as trapped steam can soften the coating. Serve immediately for the best crispness.
Can I make these tenders ahead of time?You can prepare and bread the chicken but should bake them fresh for the best texture. Alternatively, bake them, then reheat in the oven before serving.
Are these tenders suitable for meal prep?Absolutely! You can batch-cook these tenders and store them in the fridge, making them a great option for meal prep during busy weeks.
What dipping sauces pair best with these chicken tenders?Options are endless! Honey mustard, ranch dressing, BBQ sauce, and hot sauce are all popular choices that complement chicken tenders nicely.
Can I substitute the chicken tenderloins with a different cut?Yes, chicken breast can be used as an alternative, but slicing them into even strips can ensure uniform cooking.
Conclusion
Crispy Homemade Baked Chicken Tenders are a delightful addition to any dining experience. Their perfect balance of flavor and crunch can elevate your meals. Whether served as an appetizer or a main course, these tenders satisfy every palate. With the tips, variations, and FAQ section outlined, you can customize this recipe to suit your needs. Enjoy creating these irresistible chicken tenders that are sure to impress your family and friends!